


An eLearning storyboard often looks like a formality at the start. Teams skip depth to “move faster.” Instructional design storyboard tools and techniques can make a dramatic difference here. Then production begins — and rework kicks in. SMEs rewrite content mid-build. Designers adjust screens after feedback. Developers wait for clarity that never comes.
Why does this happen? Everyone involved in production sees only part of the picture, not the full canvas. This is where misalignment shows up. While SMEs think in subject depth, designers think in flow. Developers think in logic and constraints. All you can count on in this scenario is that requirements stay vague, so every review cycle turns into a reset. This is where timelines slip and costs grow.
An instructional design storyboard fixes that early. It acts as a planning and alignment tool across roles. It becomes a shared reference point that all production participants turn to in order to move in the same direction. Our team always uses storyboards to align instructional design, UX decisions, and LMS configuration before development starts.
In this article, we’ve put together a step-by-step plan on how to build a storyboard that actually reduces production risk. You’ll also see real examples and templates. When structure is defined upfront, production becomes more predictable — with fewer revisions and less coordination overhead.
TL;DR
- Most teams treat storyboards as documentation. In practice, they function as a production control layer.
- An instructional design storyboard is not just a content outline — it defines how learning logic, UX, and technical behavior align before development starts.
- Most production issues in eLearning stem from missing or shallow storyboards, where requirements remain implicit and roles interpret them differently.
- A complete storyboard includes content, narration, interactions, media notes, and assessment flow — not just on-screen text.
- When done properly, storyboards reduce rework, stabilize scope, and make LMS implementation more predictable.
What Is an Instructional Design Storyboard — and What It Actually Controls in Production
A storyboard defines the structure. In instructional design, it is the document that specifies what gets built — screen by screen — before any development begins.
In production terms, a storyboard defines how a course becomes a working system. It determines what the learner sees, clicks, and completes at each step. This includes:
- Screen-by-screen planning of the full learning flow
- Learning content, interactions, and media for each step
- Assessment logic and feedback paths
- Navigation rules and progression triggers
At its core, a storyboard connects instructional intent with technical execution. Designers define the experience. Developers translate it into the LMS or authoring environment without interpretation gaps. Here is what a storyboard is in instructional design.
When the storyboard is precise, development follows a clear path. When it is vague, teams start interpreting — and that is where timelines stretch, rework increases, and costs grow.

An instructional design storyboard maps scenes, scripts, visuals, and audio to create engaging e-learning experiences with built-in interactions and assessments.
Storyboarding as a Process: How Learning Objectives Become Structured Course Flow
Storyboarding defines how that structure is created.
In other words, what is storyboarding in instructional design? It is the process where learning objectives are turned into sequence, interaction, and measurable outcomes — before any development begins.
At this stage, intent becomes sequence. Learning objectives stop being statements and turn into actions, decision points, and checkpoints inside the course. This is where structure takes body:
- Translating learning objectives into screens with a clear purpose
- Sequencing content and activities so each step builds toward a defined outcome
- Mapping assessments and feedback to validate understanding at the right moment
In practice, this process forces early alignment. Teams decide what to include, what to remove, and how deep each part of the course should go — before production begins.
The main advice here and now is to take your time. Quickly finalizing the course in 4 out of 5 cases leads to an inconsistent course path. But when done properly, storyboarding reduces back-and-forth during development.
Why Skipping a Storyboard Leads to Rework, Delays, and Unclear Scope
Teams often skip a storyboard to “save time.” In practice, this shifts the work into later stages — where changes are more expensive and harder to control.
Development may start faster, but alignment issues surface quickly. SMEs request content changes mid-build. Designers adjust flow after feedback. Developers rework logic that was never fully defined. Each iteration adds time and compounds coordination effort.
The next issue is scope. Without a defined structure, teams work with assumptions. One screen turns into three. A simple interaction turns into a branching scenario. Reviews expand because no one agreed on boundaries upfront. A similar situation occurred on a project we implemented for the EBRD, where we eventually convinced the customer to start the next course with a training storyboard.
Time spent on planning reduces time spent on rework. In practical terms, this leads to:
- Faster development cycles, because key decisions are made before production
- Fewer revisions, since structure and logic are agreed upon upfront
- Clear scope control, with defined screens, interactions, and constraints
- Better learner experience, driven by a consistent and intentional flow
Types of Instructional Design Storyboards: Choosing Between Logic and Visual Flow
Teams often ask which format to choose. The better question is: what do you need to control — logic or experience? The answer defines how your storyboard should be structured.
Written storyboards: controlling logic, rules, and learning flow
If the question of whether to make a storyboard is already closed (and the previous sections should have convinced you), let’s take the next step and choose how your storyboard should be structured.
We regularly receive questions about which format to choose. If we skip the usual “it depends” discussion, we can say the following — written formats (most teams use table-based formats in Docs or Sheets) work best when there is a lot of narration, complex logic, or branching, and when the storyboard serves as a specification for the developer.
Most instructional designers point to the strengths of written storyboards as accuracy of logic, convenience for development, and easier review of content and scenarios (conditions, feedback, scoring).
The main limitation is the lack of a clear view of the future course. Stakeholders may not “see” the UX, and it becomes harder to discuss and approve the design.
Use a written format when you need to:
- Capture branching logic, rules, and conditions in detail
- Align SMEs on content accuracy and sequence
- Define narration, on-screen text, and feedback logic
- Control scope in complex or compliance-driven courses
")
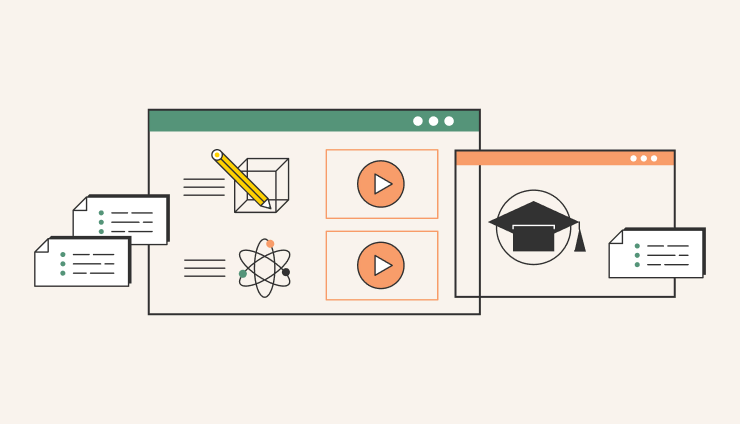
A PowerPoint-based storyboard slide outlines onboarding instructions, audio guidance, and completion criteria for a Storyline e-learning module.
Visual storyboards: aligning experience, ux, and interaction design
Visual formats allow you to focus on a preliminary representation of the user experience: what the screen will look like, how the learner moves through the course, and where prompts or animations appear.
Design teams typically use slides or simple wireframes. Each screen represents layout, UI elements, and media placement.
Use a visual format when you need to:
- Design layout, UX, and interaction patterns
- Align stakeholders on look and feel early
- Plan multimedia elements such as video, animation, or simulations
- Prototype interactive or learner-driven experiences
The main advantage of visual storyboarding is exactly that — the visual itself. You’re not discussing text in a document, but the future interface of the course.
Visual vs. written storyboards: trade-offs that affect production
Here’s a direct comparison to guide the choice:
| Criteria | Written Storyboards | Visual Storyboards |
| Primary focus | Logic, rules, narration | Layout, UX, media |
| Format | Tables (Docs, Sheets) | Slides, wireframes |
| Best for | SME review, complex logic | Interactive, multimedia courses |
| Strength | Precision and clarity | Fast alignment on experience |
| Limitation | Harder to visualize UX | May overlook logic dependencies |
Choosing the right approach
Many teams combine both formats. They define logic in a structured document and validate experience through visuals.
You can choose between logic and visual flow based on one criterion: who is the main reader of the storyboard, and what is the task of the document?
- If the main user is a developer and you need precise programming notes and branching logic, choose a logic-first, written storyboard.
- If you need to align quickly with business stakeholders, marketing, or non-technical SMEs, visual flow (slides, diagrams, prototypes) helps clarify the vision faster.
For large projects with multiple audiences, we reccomend create two artifacts. You will get a short visual storyboard for alignment and a detailed logic storyboard for development. It’s a win-win situation.

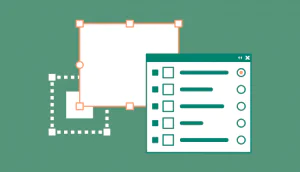
This interactive storyboard maps branching scenarios, learner decisions, and feedback flows to guide Storyline-based e-learning development.
Instructional Design Storyboard Examples: How Structure Changes Across Use Cases
Instructional design storyboard examples vary depending on the learning context. The same format does not work equally well for compliance or academic courses. The structure adapts to what the course needs to achieve.
Compliance or onboarding training
- Learning goal. Ensure learners understand required rules, policies, or processes and can apply them correctly.
- Structure. Linear and tightly controlled. Content flows step by step, with limited branching. The storyboard focuses on clarity, consistency, and full coverage of required topics.
- Typical screens: Intro and learning objectives, Policy explanation screens, Scenario-based checks, Knowledge assessments with feedback.
- Interaction types: Multiple-choice questions, Scenario-based decision points, Confirmation and reinforcement feedback.
The storyboard, in cases like this, prioritizes completeness and accuracy. Logic and assessment coverage matter more than visual complexity.
Product or sales enablement training
- Learning goal. Help learners understand product value, messaging, and how to apply it in real-world conversations.
- Structure. Modular and scenario-driven. Content is organized around use cases, objections, and practical application rather than strict sequence.
- Typical screens: Product overview and positioning, Feature-to-benefit mapping, Customer scenarios, Objection handling exercises.
- Interaction types: Branching scenarios, Role-based simulations, Guided decision paths.
The storyboard must capture decision logic and realistic scenarios. Interaction design becomes central to learning effectiveness.
Academic or blended learning course
- Learning goal. Develop conceptual understanding and support knowledge progression over time.
- Structure. Layered and progressive. The storyboard connects theory, examples, and practice across multiple modules or sessions.
- Typical screens: Concept explanation, Case studies or examples, Practice exercises, Reflection or discussion prompts.
- Interaction types: Open-ended responses, Applied exercises, Peer or instructor-led activities.
The storyboard in that case focuses on progression and knowledge building. It must support continuity across modules and align with broader curriculum goals.

eLearning Storyboard Templates: What to Include to Avoid Gaps in Production
What do we have now? The eLearning storyboard template acts as a roadmap for development. So what should it include, and which format should you choose to avoid gaps in production? Let’s look at the practical structure used in production-focused storyboard templates.
Core elements of an e-learning storyboard template
| Element | What It Captures | Why It Matters in Production |
| Screen ID | Unique identifier for each screen or step | Keeps structure consistent and simplifies communication between designers and developers |
| Learning Objective | What the learner should achieve at this step | Ensures each screen has a purpose and supports overall course outcomes |
| On-Screen Text | Visible content shown to the learner | Defines what is actually displayed in the interface |
| Narration / Audio | Voice-over script or audio instructions | Aligns spoken content with visuals and prevents duplication or gaps |
| Interaction | What the learner does (clicks, selects, inputs) | Defines behavior and drives engagement logic |
| Media Notes | Visuals, animations, videos, UI elements | Helps design and development teams prepare assets and layout decisions |
In practice, teams adjust these fields based on complexity. For simple courses, you may remove columns. For complex ones, you may add logic layers or technical notes.
Common eLearning storyboard template formats
| Format | Typical Use | Strength | Limitation |
| Word / Google Docs | Linear content and narration-heavy courses | Easy to review with SMEs and stakeholders | Limited visibility of structure and interactions |
| Excel / Google Sheets | Complex logic, branching, and structured flows | Strong control over logic, conditions, and scalability | Harder to visualize UX and learner experience |
| Slide-Based Templates | Visual flow, UX, and interface design | Fast alignment on layout and experience | May miss detailed logic and interaction rules |
Most teams don’t stick to one format. They combine them based on need. For example, a table for logic and a few visual screens for alignment.
If your team struggles with reviews, the issue is rarely the template itself. It’s whether the template reflects the decisions your team actually needs to make.
If you’re choosing tools to support your storyboard workflow — Docs, Figma, authoring tools — see Top Instructional Design Tools in 2026 for a breakdown of what teams actually use in production.
How to Create an Instructional Design Storyboard (Step-by-Step)
Building an eLearning storyboard is a structured process. Each step should answer a specific question. Skipping one leaves that question unresolved.
If you’re structuring your workflow using models like ADDIE or SAM, storyboarding typically sits between design and development stages (see our guide on Instructional Design Models for eLearning: ADDIE, SAM & More).
Use the following sequence to avoid rework later.
- Define learning objectives. What needs to be taught? What must be practiced? How will success be measured? Future results should be the starting point. Define the objectives and move to the next step.
- Identify audience and context. Who is the course for? Where will it be used? When laying the foundation for a course or training, keep in mind the prior knowledge and job role of your learners. These factors directly affect complexity and interaction design.
- Choose storyboard type. You reach the first crossroads. Here, you need to make a choice before moving forward. Select a written, visual, or hybrid format. To better understand which format fits your case, return to the Types of Instructional Design Storyboards section of this article.
- Map screen flow. Once you’ve chosen a type—for example, a written format—break the course into a sequence of screens or steps. Now, the course becomes a system. Define transitions, progression logic, and flow.
- Add interactions and assessments. Turn structure into behavior. Assign interaction types and scoring rules. Here, your learning design becomes measurable, not just an abstract draft.
- Review with SMEs and stakeholders. The most difficult phase—we know this from experience—but it can be managed without disruption. Validate before development starts. SMEs confirm content accuracy. Stakeholders ensure alignment with business goals.
- Prepare for LMS development. The final step. Your storyboard is ready to be finalized as a production-ready document. Add technical details where needed: navigation rules, tracking requirements, and integrations. Developers should receive clear specifications.
If your team lacks internal capacity for LMS implementation or complex integrations, it may be worth involving an external partner. You can review Top EdTech Solution Providers in 2026 to understand who supports enterprise-level delivery.
This seven-step process defines how the course will behave in the LMS — in other words, how all drafts become a working learning module.
From Storyboard to LMS: How Structure Defines Platform Behavior and Tracking
A storyboard for eLearning does more than organize content — it defines how the course will behave inside the LMS. Each element in the storyboard translates directly into platform configuration: screens become activities, interactions define user actions, and progression rules determine how learners move through the course. When this structure is defined early, LMS setup becomes predictable rather than iterative.
At the implementation stage, the storyboard guides key configuration decisions:
- Activity mapping — how screens translate into LMS components and learning units
- Assessment setup — what is measured, how scoring works, and when feedback is delivered
- Tracking logic — which actions are recorded and how completion is defined
- Responsive behavior — how layout, media, and interactions adapt across devices
Learning platforms, whether it’s Open edX, Moodle, or Canvas, all work on structure and logic. When the storyboard is done correctly, you get reduced setup time and you also limit rework. As a result, the course will behave as intended across the platform.
Conclusion
If we had to reduce this article to one idea, it would sound like this: don’t ask whether you need a storyboard. Ask instead — do you want fewer edits, faster course production, and less development time? If yes, the logic is simple: the more decisions you make upfront, the more predictable the outcome becomes.
A strong storyboard resolves logic and behavior before production starts. A weak one leaves gaps that teams fill later through revisions and rework.
Here’s the insight most teams miss. The storyboard is not a design artifact — it’s a cost control mechanism. Every unclear decision at this stage turns into development hours later. When you treat the storyboard as a place to remove uncertainty, you don’t just improve the course — you stabilize timelines and delivery. And a budget, of course.
And one more thing. A storyboard is not about documenting content. It defines how the learning experience will function — across screens, interactions, and the platform itself.
FAQ
What is an instructional design storyboard?
It’s the bridge between design and development. Not theory. Something you actually build from. Most teams skip it at first. Then they feel the pain later. Rework. Confusion. Too many opinions. An instructional design storyboard lays out screens, interactions, content, and assessment logic in one place, so everyone — from SMEs to developers — works from the same structure instead of interpreting fragments.
What should an eLearning storyboard template include?
Start simple. Screens. Objectives. Text. Narration. Interactions. Media. That’s the baseline. Enough to move forward. A strong eLearning storyboard template also defines feedback logic, branching, and tracking rules, which helps teams remove ambiguity before development and avoid constant revisions during production.
What is the difference between visual and written storyboards?
Two approaches. Two priorities. Written means logic. Rules. Structure. Visual means layout. Flow. Experience. The real difference shows up in what gets clarified first, because written storyboards reduce ambiguity in content and logic, while visual ones help stakeholders understand how the course will actually look and behave.
How detailed should a storyboard for eLearning be?
It should be detailed enough so developers don’t stop and ask questions every few screens. That’s a good rule of thumb. If something feels “obvious," it might still need to be written down. Flow, interactions, assessment logic—these things tend to break when they’re assumed instead of defined.
Can one storyboard template be reused across courses?
Yes, but only to a point. Templates work well as a structure—they give you a starting frame. Still, each course brings its own logic, flow, and constraints. Reusing a template without adjusting it usually creates gaps. It might look complete, yet something will be missing when development starts.

- TL;DR
- What Is an Instructional Design Storyboard — and What It Actually Controls in Production
- Storyboarding as a Process: How Learning Objectives Become Structured Course Flow
- Why Skipping a Storyboard Leads to Rework, Delays, and Unclear Scope
- Types of Instructional Design Storyboards: Choosing Between Logic and Visual Flow
- Instructional Design Storyboard Examples: How Structure Changes Across Use Cases
- eLearning Storyboard Templates: What to Include to Avoid Gaps in Production
- How to Create an Instructional Design Storyboard (Step-by-Step)
- From Storyboard to LMS: How Structure Defines Platform Behavior and Tracking
- Conclusion