Despite the availability of convenient and multifunctional video-making features, creating a high-quality eLearning video is a complex process that requires some training and experience. This article will walk you through the entire video creation process and show you how to create a high-quality training video. Let’s get started.
How to Create eLearning Videos Step by Step
We have sorted out the formalities, and now you are convinced that video is one of the most powerful learning tools. Now is the time to figure out how to get your hands on this tool. We will go through the entire process of creating video material to be armed with knowledge and ready for the creative process.
Step #1. Invest in Hardware and Software
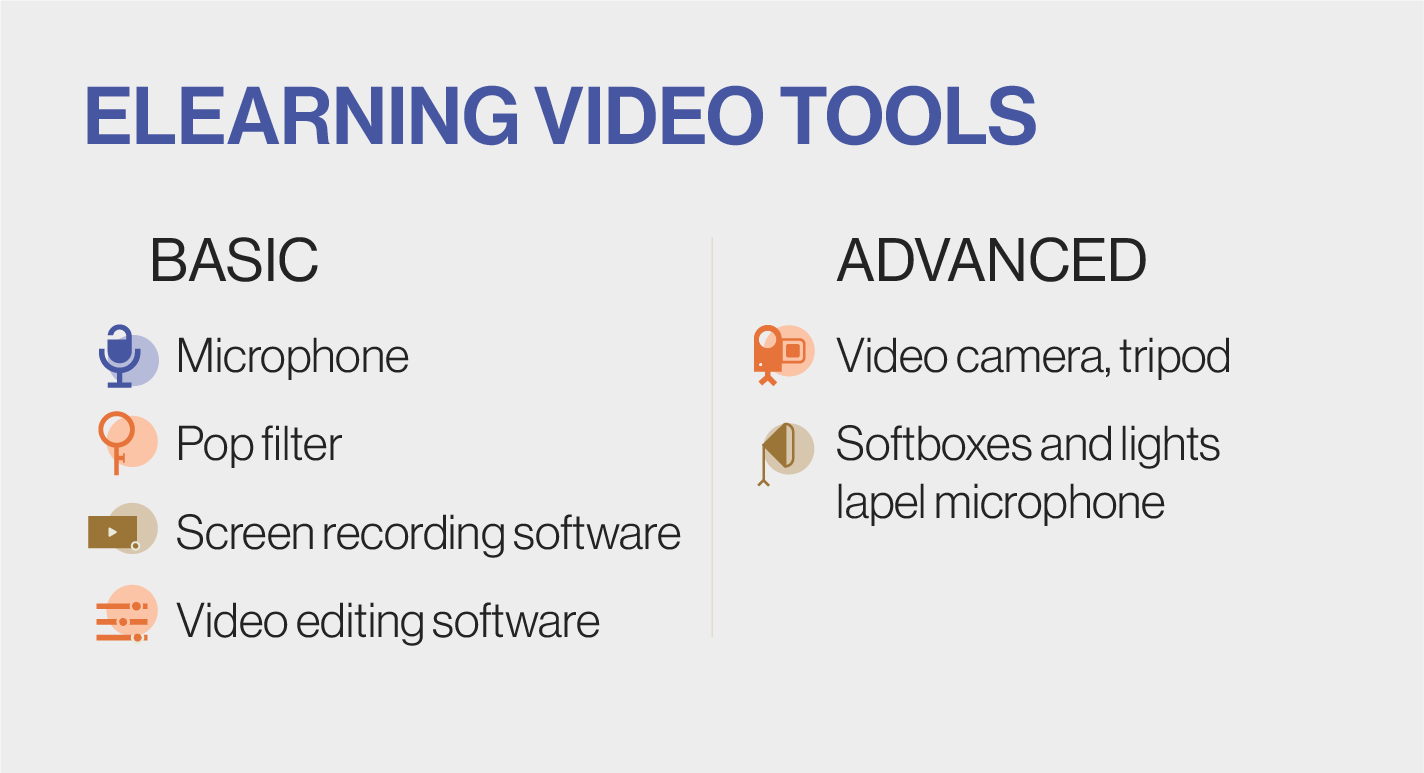
You can’t create eLearning videos at the snap of your fingers. First, you need to get hold of the tools to create it. They can be divided into two groups, namely Basic and Advanced.
Basic tools
These tools are a must for any video and should be the first thing you take care of. These include:
-
Microphone. Even if you are just getting started with eLearning video creation, you should invest in a good microphone. This will immediately increase the video quality since it is easier to convey information with the help of a clear voice without interference. At the same time, it will be nice for students to hear a well-voiced video.
-
Pop filter. A small microphone attachment will help eliminate natural noises during recording and improve the quality of the voice recording.
-
Screen recording software. Even though we have put this tool in Basic, screen recording may be necessary only for a specific video type. However, it will be helpful to have it handy if you want to introduce students to work in software or if your lesson requires joint work with the material from you and the students.
-
Video editing software. Video editing software is the cornerstone of video production. In these programs, you attach parts of a video, add visual effects, record voice, and more. Therefore, you should take care of licensing good video editing software before you create eLearning videos. On our behalf, we can recommend the three most popular programs.
The most popular eLearning video tools
| Tool Name | Adobe Premiere Pro | Final Cut Pro X | Filmora |
| Pricing | $29.99/month for individuals/business
$19.99/month for students $14.99/month for universities |
Free trial
$299/one-time payment |
Free trial
$39.99/year individual $69.99/one-time payment individual perpetual $155.88/1 user/year business annual $7.99/month student Educator plan is not disclosed (contact vendor) |
| Reasons to buy |
Works with both Macs and PCs Easy to learn and use Brand new AI-based editing features 4K support |
Intuitive interface Apple ecosystem support Impeccable sound |
Intuitive and straightforward to use Fast video rendering A variety of effects & filters |
| Reasons to avoid | Still no AR and 360-video support | No Windows support | No support for DVD menus or chaptering |
Advanced tools
You may need these tools to produce sophisticated instructional videos, lectures, and more.
-
Video camera. If you want to record full-fledged lectures or your videos require the presenter to appear in the frame, you can’t do so without a high-quality camera.
-
Tripod. To capture someone on camera, it is advisable to have a tripod. Depending on the location and shooting style, you may need several of them (tripods of different types and heights).
-
Softboxes and lights. This category includes softboxes for creating soft lighting while shooting and any additional lighting sources (lamps, chandeliers, spotlights) that will help correctly illuminate the frame when you make eLearning videos.
-
Lapel microphone. When shooting on a camera, a desktop microphone will not be a very convenient solution, so it is better to get hold of a small microphone that can be discreetly attached to clothes.
Step #2. Choose Your Topic and Learn Your Target Audience
The next step is to choose the topic. Users stop watching videos incredibly quickly if they don’t present any relevant information. To avoid this, you should study your audience. To hit the heart of your audience, you need to understand their problems and come up with ways to solve them.
For example, you decide to create eLearning videos on the history of Ancient Rome for your students. Before production, talk to them and determine which aspects of this topic are most challenging and what they would like to see in a detailed video format. For example, it may be difficult for students to memorize dates – in this case, you can sharpen the attention of your video on the timelines of various events. If students are bored with learning the hierarchy of a political system, you can visualize its structure using video magic.
Step #3. Pick the Right Type of Video
The next step is to choose the style of the video, namely, how you will present the information. There are several types of videos, and each option is helpful in its specific situation. There is no one-size-fits-all solution, so choose wisely when you create eLearning videos.
| Video type | Description |
| Screencast | At its core, it is a recording of your screen and your actions on the device. This format is perfect for learning to work with various software. |
| Micro video | A video format that has become very popular with the advent of the Tik Tok platform. The video takes only 10-15 seconds and relies more on intuitive video sequences or on-screen text than voice acting. |
| Presenter video | This format includes the recording of lectures where the lecturer tells new material against the blackboard background. However, this is not the only option for such a format. The main distinguishing feature is the presence of a presenter in front of the camera. |
| Roleplay | In such videos, a specific scenario is played out with the actors, which is designed to show various interactions using the example of a role-playing game. For example, this could be a conversation between a customer and a support team. |
| Animation | This video format relies entirely on effects, animations, graphics, and on-screen text. In addition, it is also possible to add voice acting. |
| Interactive video | Quite an unusual video format that provides a choice to the viewer and is somewhat reminiscent of an interactive film. For example, during a first aid video, you can branch the plot and give the viewer a choice between one action or another (for example, what to do first: listen to the heartbeat of the injured person or check the pulse). |
Step #4. Hire an SME and Create a Script
Even though you may already have a complete picture of your video in your head and are ready to create eLearning videos, you should first hire a subject matter expert (SME) to help you with the material on your chosen topic. This specialist combines his knowledge and deep research to create text material that you later turn into a script.
Once you have completed the educational material on hand, it’s time to turn it into a script. Then, you can start transforming it into a source of structured storytelling where there is a beginning and an end. Along the way, you can sketch a video storyboard where you depict the sequence of displaying certain information.
For example, at the beginning of the video, you should greet the viewers and briefly describe what the video will be about. At this time, you can show the video’s title on the screen, and as the annotation is narrated, in the next frame, you can visualize the blocks of information covered in the video. Thus, you work through the entire video from the beginning to the end credits.
Step #5. Recording and Editing
Once your script is polished, it’s time for the longest and most routine part, namely, recording the necessary material and editing it. We can’t say for sure how long it takes to create eLearning videos, as it depends on the type of video, the amount of your material, and much more. However, the only thing we can say is that the more complex the material presentation you choose, the longer your video production will take.
Step #6. Review and Iterate
Here it is, the home stretch. You have a rough draft of your film on hand. To create eLearning videos that your learners will praise, your videos should be watched by an unbiased circle of people who will assess your work with a fresh look. You can show the video to your friends or on the thematic forum on the topic of your choice.
Another option would be to use the Techsmith Video Review service. This platform allows you to upload your video to hosting, make it public, and get constructive feedback from viewers.
Listen carefully to criticism, as it is an integral part of the journey to improve your video. Take into account the strengths of your video and eliminate the weak points that viewers think are pulling your video back. Then, after all the additional iterations of improvements and checks, you can release your video to your students.
Wrapping Up
Video content-making is a process that should be approached with the necessary tools and knowledge. While some video types seem incredibly easy to produce at first glance, it still takes a certain amount of trying before you hone your skill in creating instructional videos. If you doubt your skills or simply do not have time to create high-quality videos for your course, you can always turn to a professional team that will turn your ideas into full-fledged video material for the training course.
Raccoon Gang is a team with many years of experience developing and implementing custom solutions in the eLearning industry. Our main goal is to provide the best technical and content solutions for educational institutions and businesses to help take their learning processes to a whole new level. If you already have an idea you want to bring to life, drop us a line, and our representative will contact you within 24 hours to schedule a meeting.


