Any introduction to rapid instructional design today is impossible without mentioning such terms as speed and flexibility in the context of learning and development.
What is this due to? 39% of workers’ core skills will shift by 2030, employers say. At the same time, on the other end of the scale, there are completely contradictory numbers — employees received only 47 training hours in the period 2024-2025.
That mismatch hurts business outcomes in the long term. Yet, Rapid Instructional Design (RID) closes the gap. It favors small scopes, quick drafts, and real learner feedback. You release, learn, and improve — fast. And your training costs remain optimized.
In this guide, you’ll get 3 things:
- First, a clear definition of rapid instructional design.
- Second, the core principles and a simple loop you can run this quarter.
- Third, where RID helps most, plus fixes for common risks.
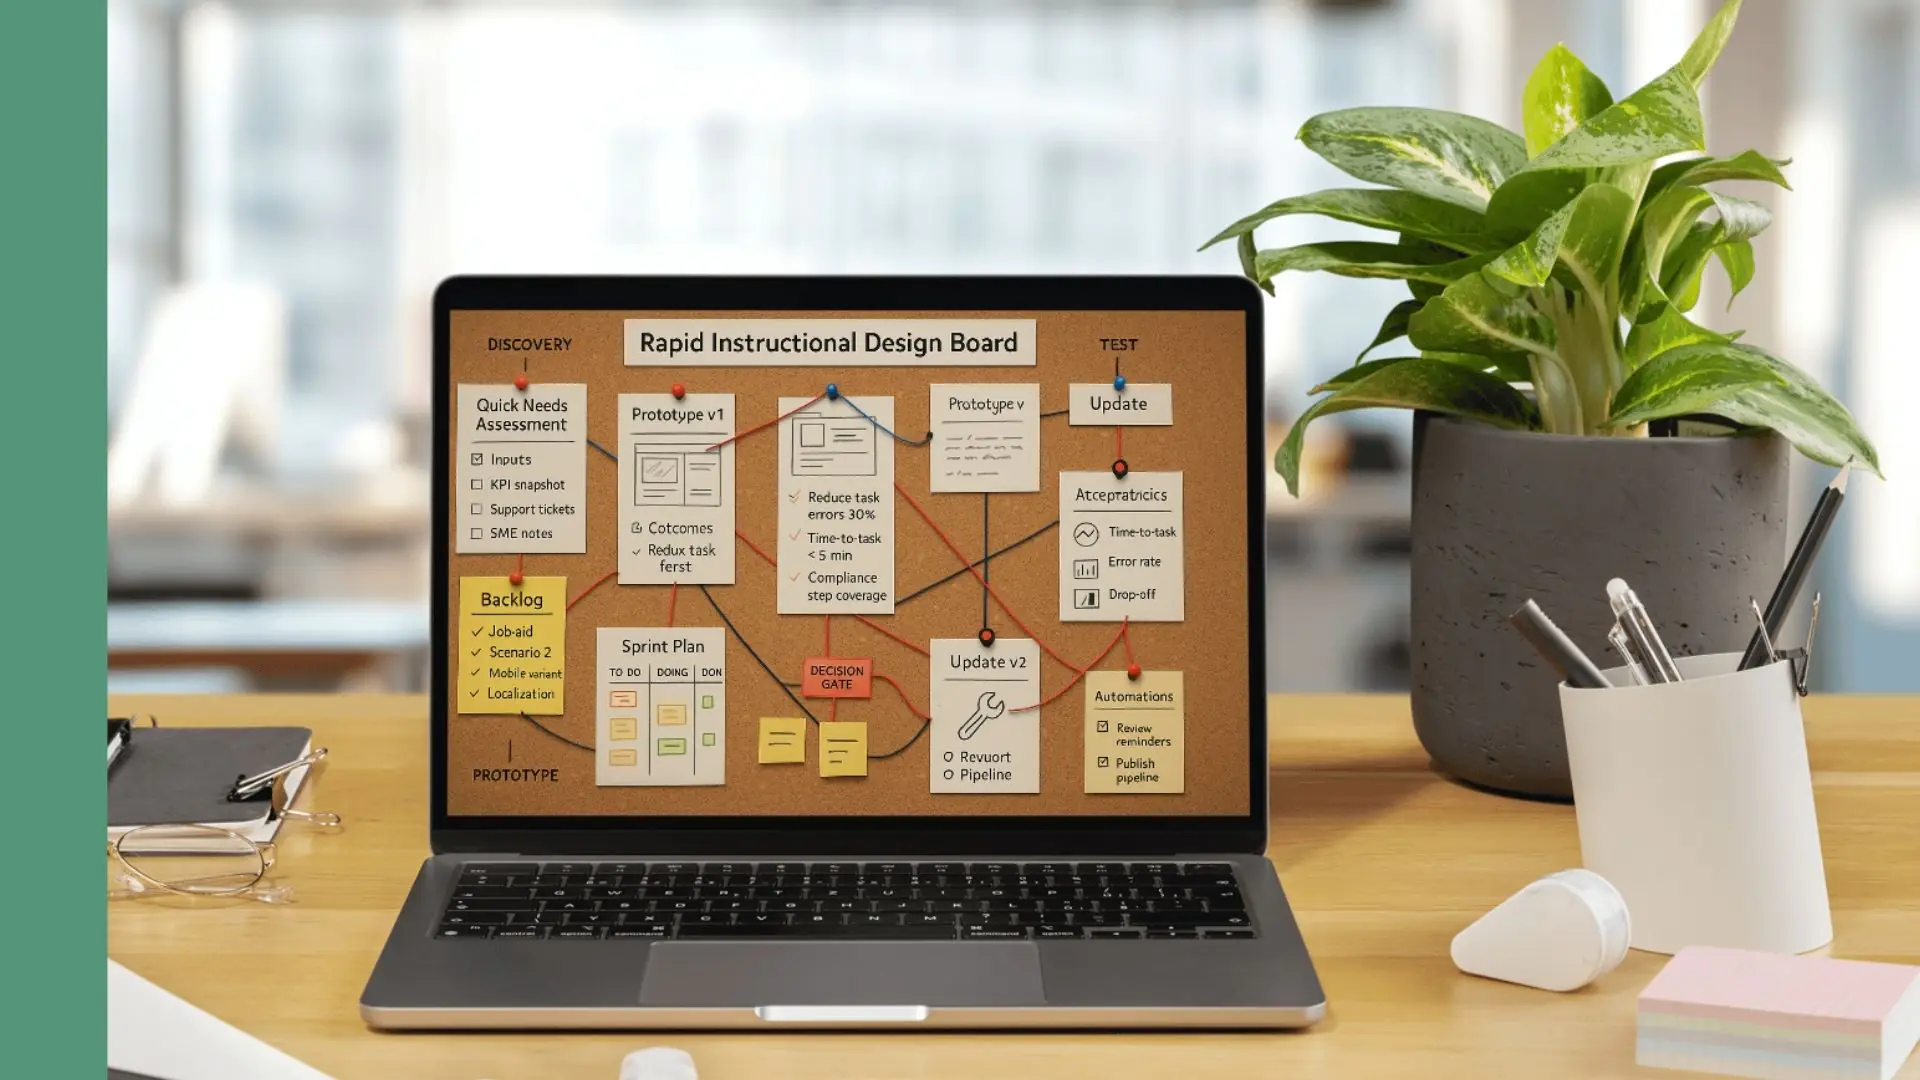
Rapid Instructional Design Board — mapping the agile workflow from needs assessment to testing and updates.
What Is Rapid Instructional Design?
Rapid Instructional Design is a fast, iterative way to build a course. By the way, you can also use this approach to create employee training, too. For example, you can build small learning assets, test them with real users, and refine them just before the next step. Scope stays tight. Feedback and usage data will be your polar star. That’s why many teams call this rapid eLearning design.
RID differs from traditional methods in three ways:
- Designers and course creators choose prototypes instead of long documents.
- Course and training testing happens early and often, not only at the end.
- Design teams reuse templates and components to cut build time and rework.
RID connects to ADDIE, but runs it in short loops. Analysis becomes a quick hypothesis. Design and development merge into a working draft. Implementation starts with a pilot. Evaluation is continuous, informing the next cycle.
The rapid instructional design model also borrows from Agile learning methodologies. Teams plan sprints around specific performance outcomes. They maintain a backlog of bite-sized objectives.
In addition, you can replace lengthy sign-offs with short reviews with subject-matter experts. Each increment must meet clear acceptance criteria, such as fewer task errors.
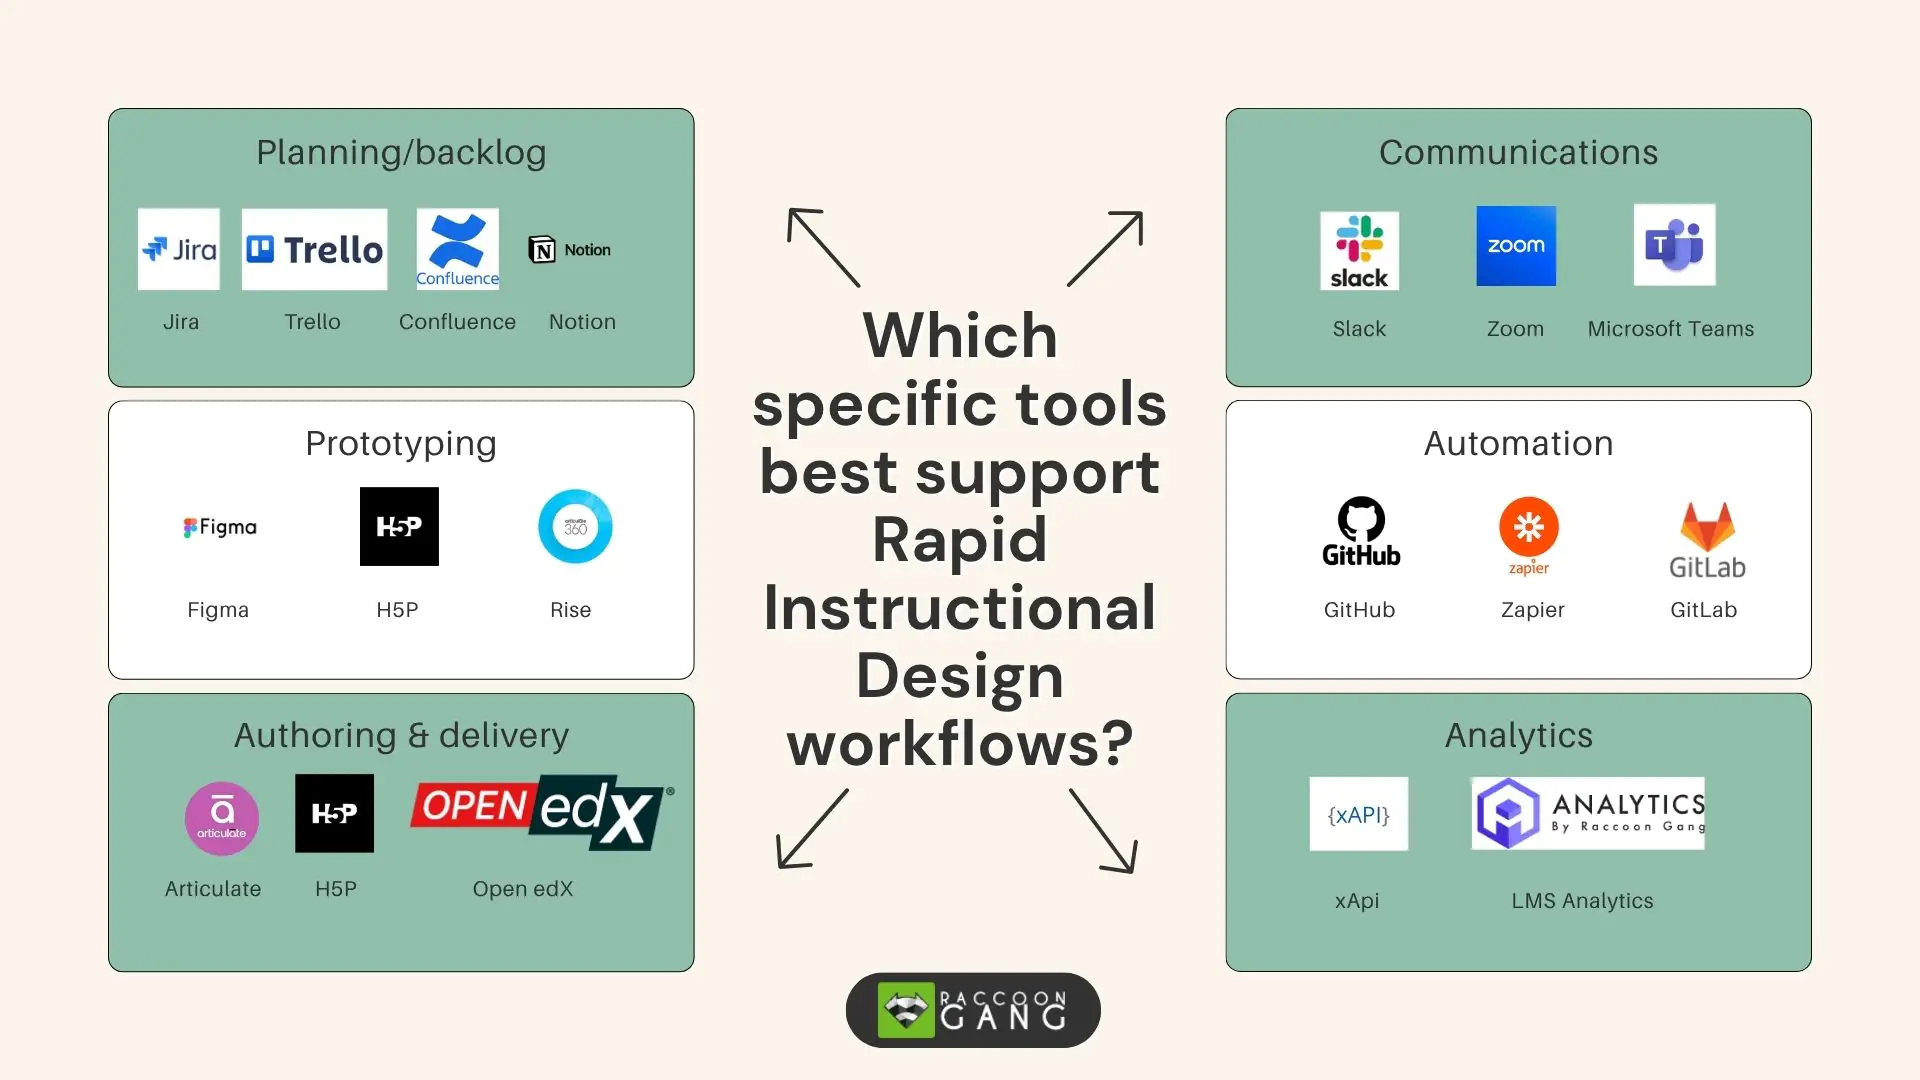
An overview of top tools supporting Rapid Instructional Design — from planning and prototyping to automation, communication, and learning analytics.
Key Principles of Rapid Instructional Design
To apply the key principles of RID, you need to divide the instructional design process into small, repeatable cycles. Instead of eating one big pie, you eat one cake at a time. Here’s what it’s all about 🍰
Therefore, each principle below keeps your projects moving and tied to business results:
Speed and efficiency
The main ideas of the principle are to shrink the scope and standardize assets across projects. This principle leads to the cycle time reduction.
- Timebox each step. Protect short cycles.
- Reuse templates, quiz banks, and UI components.
- Chunk content into micro-assets you can ship fast.
- Automate reviews with checklists and rubric links.
- Track cycle time per asset and work in progress.
Collaboration and iteration
The realization of this principle relies on close teamwork among SMEs, designers, and reviewers. All these specialists should work together in sprints.
- Co-create with SMEs, not after them.
- Define “ready” and “done” before work starts.
- Pilot with a small learner cohort every sprint.
- Collect comments in one tool to cut rework.
- Use acceptance criteria tied to task performance.
Learner-centered design
The learner-centered design principle gives learners practice with real constraints. Your task should mirror real workflows.
- Start with the job task, not the topic list.
- Write outcomes as observable behaviors.
- Design practice that mirrors real constraints.
- Add job aids where training isn’t needed.
- Measure task errors, not only completion rates.
Continuous improvement
Each next round of fixes is based on the previous step’s insights.
- Review each release with data, not opinions.
- Watch drop-off points and support tickets weekly.
- Retire weak items; promote strong ones to templates.
- Log rework causes and fixes root issues.
- Plan one improvement per sprint and ship it.
Be fully armed
It’s not every day that you deal with a different course or training topic. That’s normal. It’s also obvious that you don’t have to know or be able to do everything. You can always call on experts like Raccoon Gang, who have (a) experience in rapid design and (b) everything you need for successful instructional design.
The Rapid Instructional Design Model Explanation
Rapid Instructional Design runs as a tight loop: Assess → Prototype → Build → Test → Update → Repeat. Here are the actions that take place during the implementation of the rapid model:
Quick needs assessment
Define the job task and the gap on one page. Pull signals from KPIs, tickets, and SME notes. Set two or three measurable outcomes. Timebox to 0.5–1 day.
Prototype learning experience
Next, create a clickable draft or short micro-asset. Include one realistic practice and a quick check. The SME should complete the task in the draft. Plan 1–2 days.
Rapid content creation
Build only what the outcomes require. Reuse templates, interactions, and quiz banks. Add a job aid if training isn’t needed. Expect 2–4 days per 30-minute module.
Testing and feedback
Pilot with 10–30 target learners. Observe attempts, time on task, and error types. Capture all comments in one system. Ship if acceptance criteria are met.
Continuous updates
Review learners’ analytics weekly after release. Fix high-impact issues first and transfer strong parts to templates. Retire low-value items. Deliver one improvement each sprint.
“The RID approach was taken by the Raccoon Gang team when we worked on a NASA project. This project required our instructional design team to develop the curriculum’s initial version within a 3-month timeframe, and following updates and finalization in ~ 1.5 months.”
— Project manager at Raccoon Gang.
Moreover, the modules were integrated into the LMS using the Open edX platform and SCORM standards for better compatibility and interoperability.
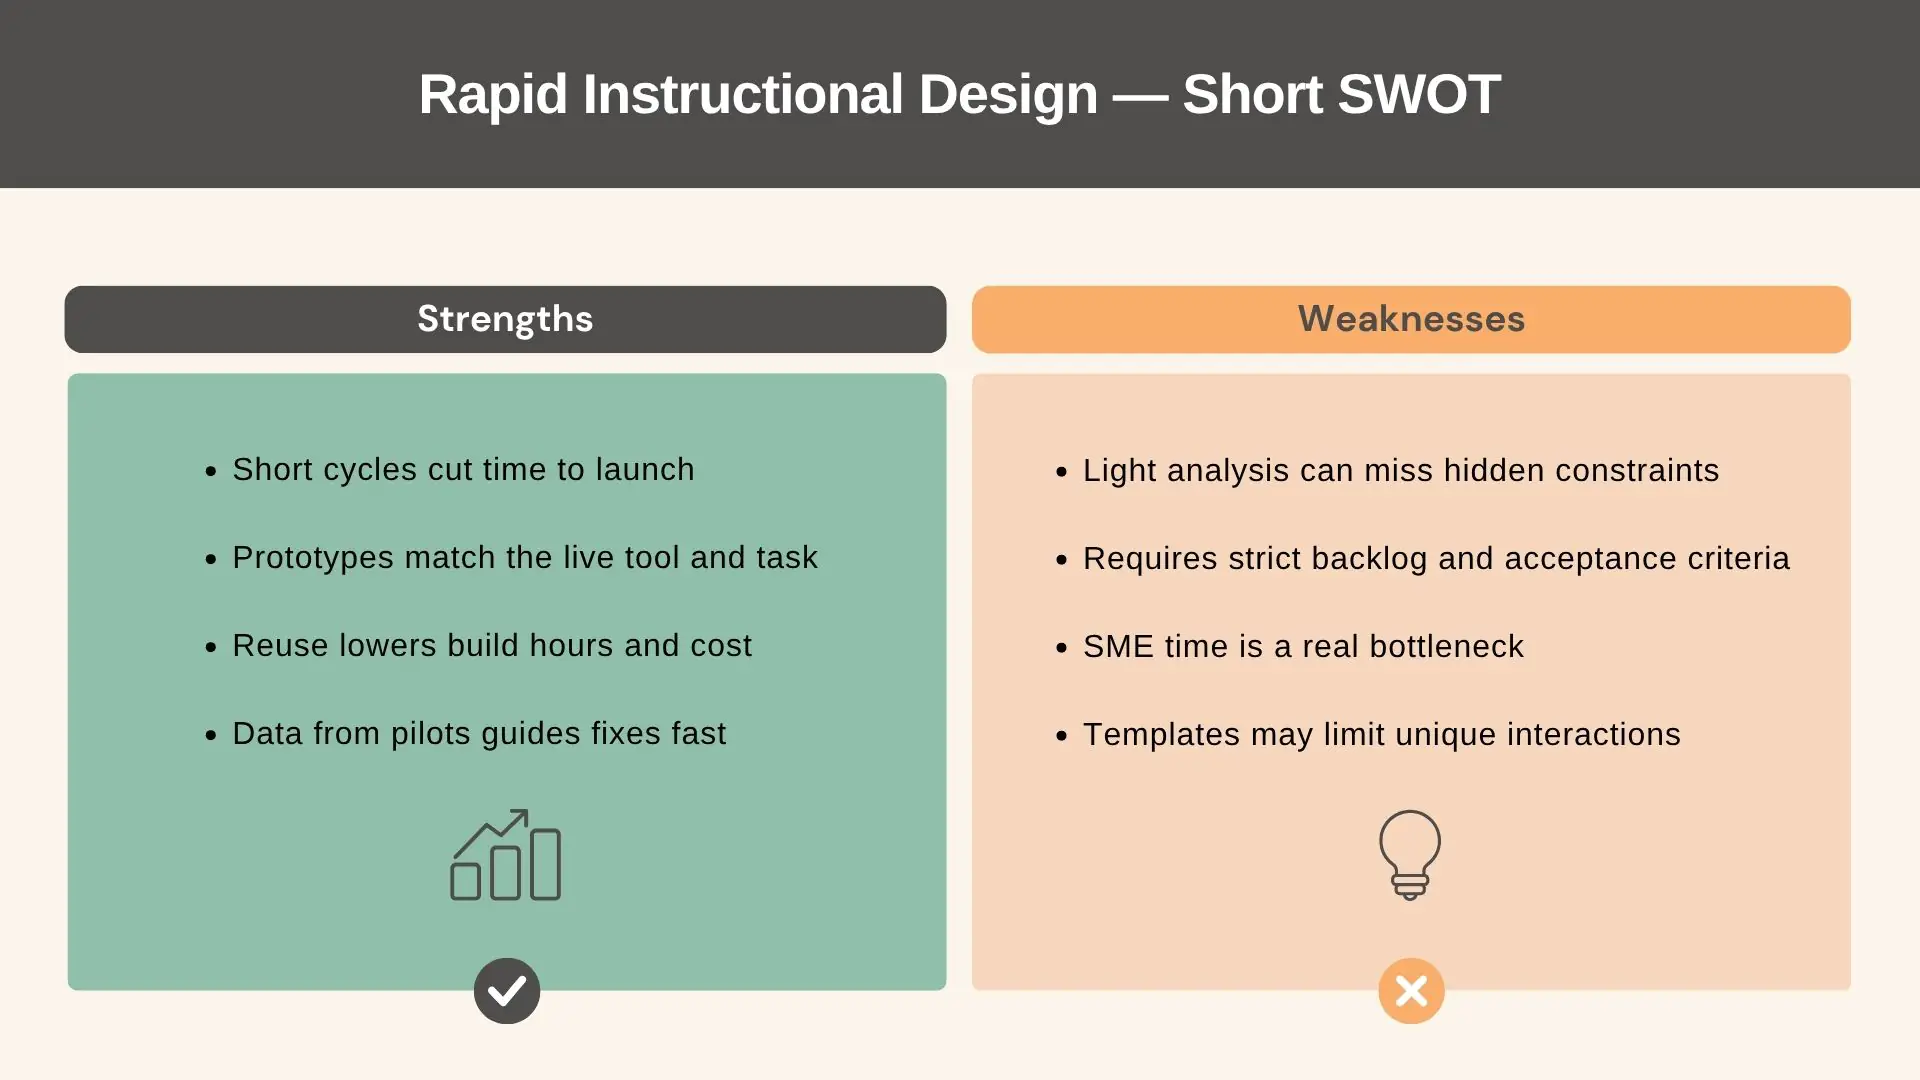
A concise SWOT analysis of Rapid Instructional Design — comparing its strengths in speed and efficiency with common weaknesses like limited analysis and resource constraints.
Benefits of Rapid Instructional Design
If, by this point, you have not yet fully understood whether this model will be helpful to you, let us show you how it helps day to day. These are the benefits of rapid instructional design you can actually use.
1) Faster launch
You release a pilot in days, not weeks. Small, working pieces go live first. Stakeholders see real screens and flows. You start enrolling learners and gathering proof while the rest builds.
2) Lower build cost
You stop reinventing every interaction. Templates, components, and quiz banks carry the load. Classic projects pay for custom work twice. Here, you save hours and spend on SME time or better media instead.
3) Tighter scope control
You ship the core path and park extras in a backlog. The course teaches the job, not the topic catalog. Classic builds swell, then shrink late. This model keeps focus and frames rework.
4) Real learner fit
You test mid-build with a small cohort. Drop-offs, errors, and comments show what to fix first. Classic teams learn this after launch. You learn it before, so completion improves and support tickets fall.
5) Faster updates when things change
Processes shift; your content follows. You edit one micro-asset and publish today. Classic courses wait for a full rebuild. Your material stays accurate and compliant without burning a sprint.
6) Lower delivery risk
You prove value with a clickable prototype. Decisions come from usage, not guesses. If the idea misses, you pivot or stop early. That means fewer dropped costs and cleaner go/no-go calls.
These benefits of rapid instructional design show up in time, budget, and learner outcomes you can measure. Result: less confusion for learners, fewer support tickets for teams, faster time to task.
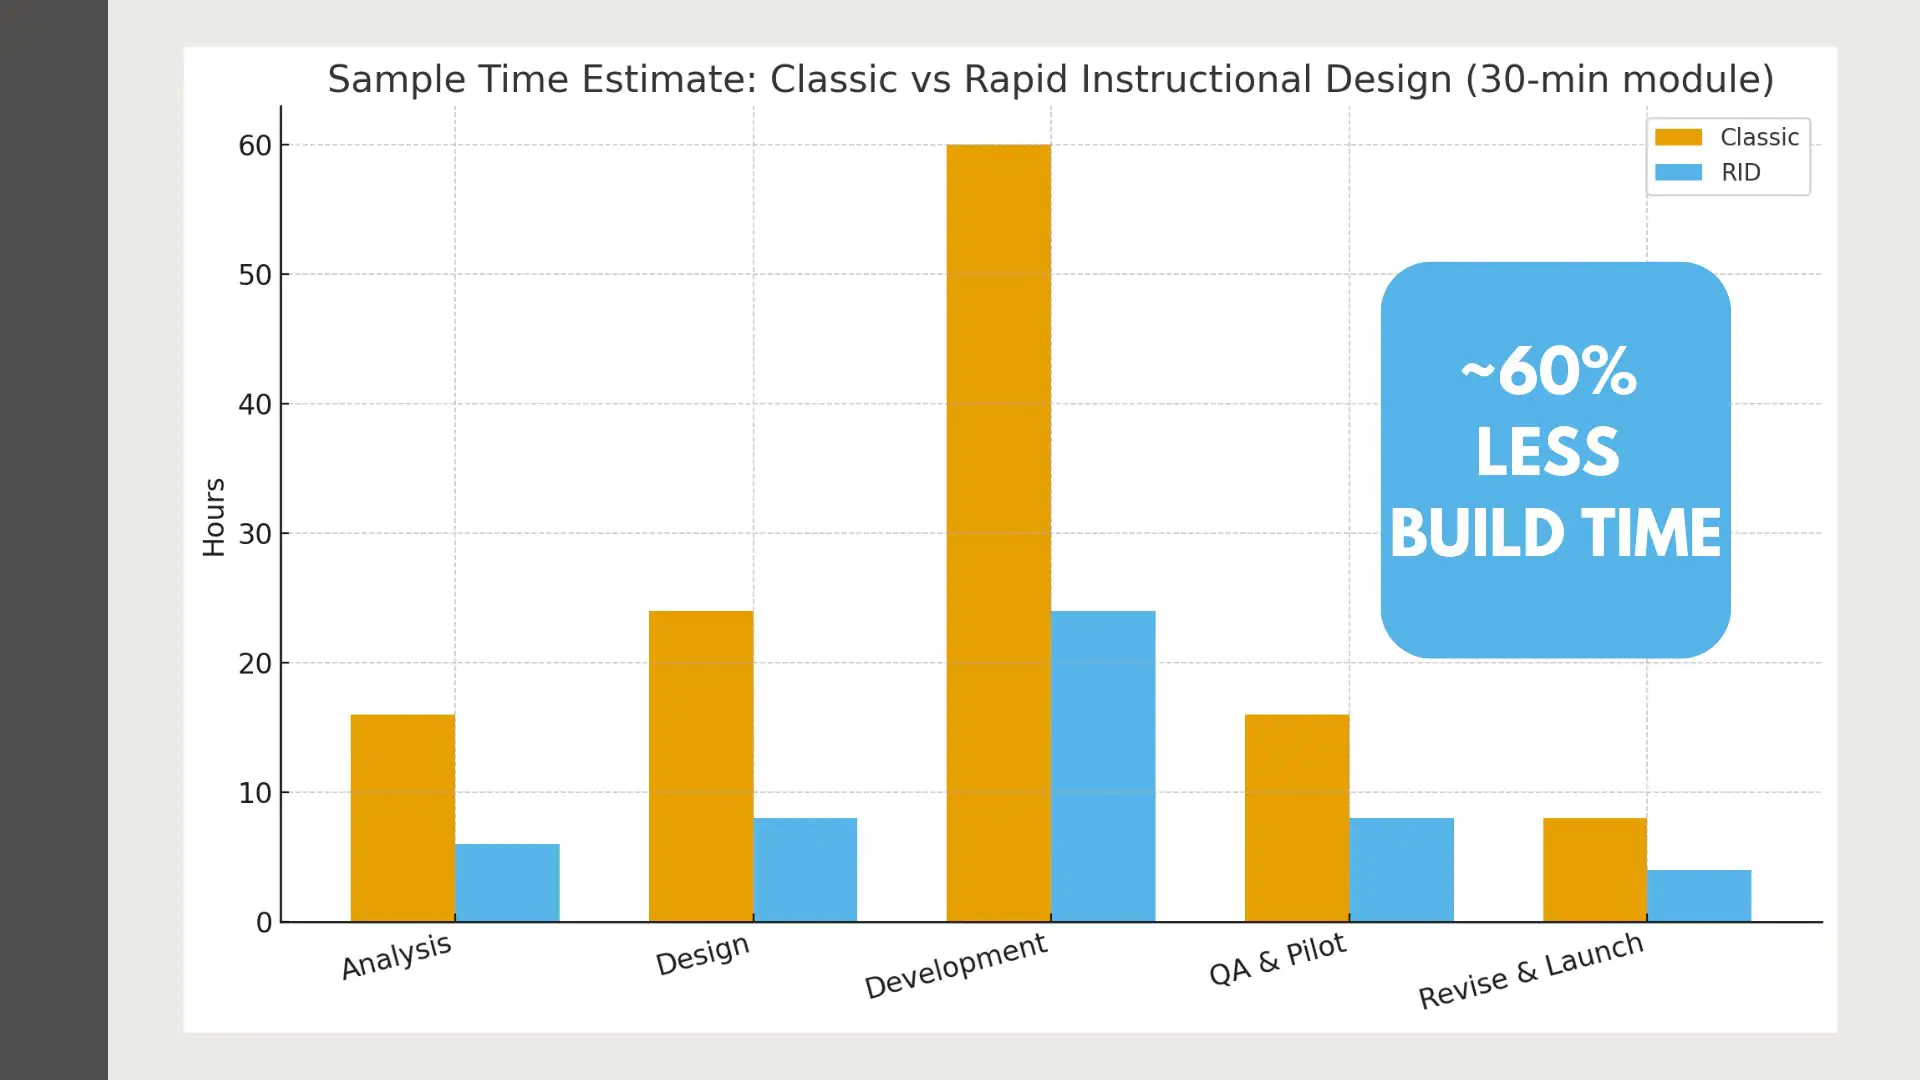
Comparison of Classic and Rapid Instructional Design time estimates — showing that RID cuts total build time by around 60% for a 30-minute learning module.
Common Challenges and How to Overcome Them
Almost nothing in the world consists only of benefits. Along with benefits, there are often certain limitations, weaknesses, or challenges. So is rapid instructional design. Moving fast risks thin analysis, scattered feedback, scope creep, and quality drift without strong guardrails. Here’s how to smooth out some sharp corners.
| Pitfall | Impact | How do we fix it | Tools / Assets |
| Speed over quality | Confusing steps; learner errors | Guardrails: acceptance criteria and QA checklist per asset | Review rubric, Storybook of UI patterns, accessibility checks |
| Thin analysis | Wrong outcomes; rework later | One-page brief: task, context, metrics, risks | Brief template, KPI snapshot, SME intake form |
| Scope creep | Delays; budget drift | Ship core path first; backlog the rest | Prioritized backlog, sprint board with WIP limits |
| Scattered feedback | Slow edits; conflicting asks | One review channel; timeboxed rounds | Comment hub, status labels, auto reminders |
| Lack of documentation | Hard handoffs; fragile updates | “Just enough” docs: change log and release notes | Versioned templates, change log, snippet library |
| SME bottleneck | Idle team time | Prep packets and live prototype reviews | SME brief, calendar slots, click-through drafts |
| Tool sprawl | Errors and rework | Standard stack and templates | Authoring templates, quiz banks, media kits |
| No pilot data | Guesswork on fixes | Small cohort test before full launch | Event tracking, error taxonomy, pilot dashboard |
| Slow updates | Outdated content | Modular blocks; edit one piece and publish | Component library, auto-publish pipeline |
| Inconsistent style | Mixed UX; brand noise | Pattern library and reusable interactions | Design tokens, branded components |
At Raccoon Gang, we apply one playbook to many eLearning course development projects. It uses modular blocks, ready-to-use templates, and automation for reviews and publishing. This approach is practical and often saves time and budget. However, some courses need a slower, more controlled build. For example, the EBRD course required a pace due to depth and oversight.
Conclusion
To summarize, rapid instructional design will work when you treat content like a product. Decisions, cadence, and metrics have clear owners. No heroics, just repeatable work. Besides, a few truths sit between the lines.
- Small scopes beat big ideas.
- One-page briefs and a living change log are enough.
- SME time needs SLAs, not wishful thinking.
- Templates are assets; protect and improve them.
- Analytics drive every next move, not opinions.
What are the first steps to transition to rapid instructional design?
- Pick one pilot module. Keep the scope to a single task.
- Write a one-page brief: audience, task, constraints, metrics.
- Set roles and cadence: product owner, ID, SME, QA; two-week sprints.
- Create a starter kit. For example: content templates, quiz bank, job-aid template, and QA checklist.
- Define “ready” and “done,” plus acceptance criteria tied to the task.
- Build a small backlog and add WIP limits.
- Centralize reviews in one channel with timeboxed rounds.
- Baseline today’s numbers: cycle time, hours per finished minute, and rework hours.
- Run two sprints, hold a retro, then lock your template library.
- Publish a change log and SME SLA so work doesn’t stall.
Rapid instructional design approach fits best for fast-moving teams. If your product ships weekly, your courses should too. RID keeps training in step with the work, without waste.


